Quickstart Guide
Contents
What's in the box?
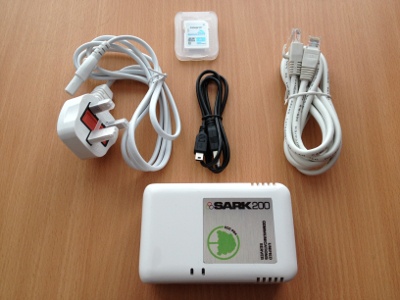
The unit is delivered with the following (see photo):-
- "figure eight" power cord
- Engineer's (black) serial USB2 to MiniUSB lead
- Cat 5 patch lead
- 4GB SD flash memory card
Pre Power-up
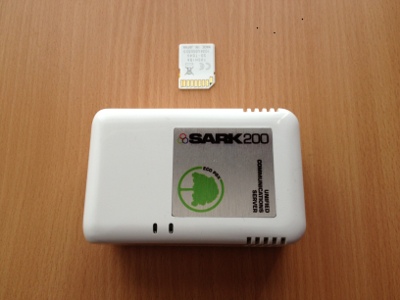
The unit requires that the SD card be inserted prior to power up. The SD card is inserted into the SD card slot. The slot is located on the left face of the device between the MiniUSB port and the reset pin-hole. The card should be orientated face down (as shown in the picture below).
Image showing SD Card ready to be inserted
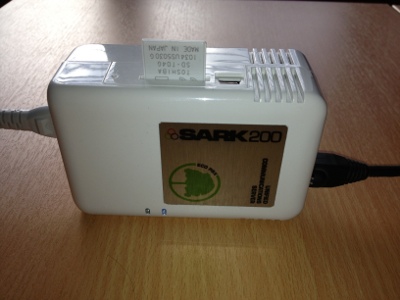
Once inserted, the device should look like the picture below. In this image you can see the SD Card correctly inserted with the MiniUSB port to the right and (somewhat less clearly), the reset pin-hole to the left.
Image showing SD Card inserted
Power Up
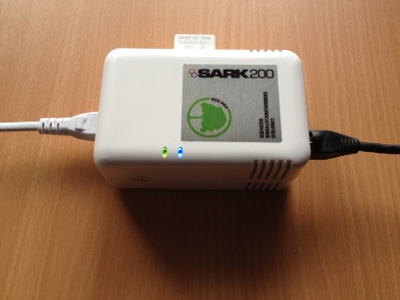
You can now attach the device to the local network using the RJ45 patch cable provided or any regular RJ45 ethernet patch lead. Insert the figure eight power cord into the base of the unit and plug it into the mains (100-240VAC). The unit will power up and come on-line in about 1 minute.
Image showing the unit powered up (power lights on)
The reset pin-hole
There is a pin-hole in the side casing just below the SD Card slot. This exposes a reset button on the motherboard. It can be activated using a long thin piece of wire; a straightened paper-clip is ideal for the job! Simply press and release and the appliance will reboot. The reset is not a factory reset, it is simply a restart/reboot button, similar to those you might find on a desktop PC.
Determining the S200 IP address
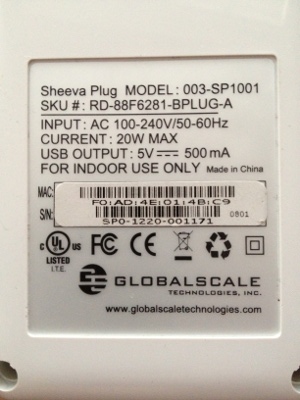
Your reseller or distributor may offer a service to pre-load your S200 with a static IP address before shipment. However, by default, the S200 ships with DHCP enabled so the appliance will attempt to get an IP address from the local DHCP server on your network. Of course, this does mean that you will have to figure out the IP address of the unit before you can log into it. You can do this in one of several ways and we'll describe three below. You will need the MAC address of your S200. It is printed on the reverse of the appliance.
Image showing MAC
The MAC address is the long number under the top bar code. For the example in the photo it is F0:AD:4E:01:4B:C9. The MAC address is unique to the device and you can use it to discover the IP address of your appliance. You can use any of the following methods;-
- Most commercial routers have a window which shows DHCP leases together with the corresponding IP and MAC addresses. Using this as a cross reference you can find the IP address of your S200.
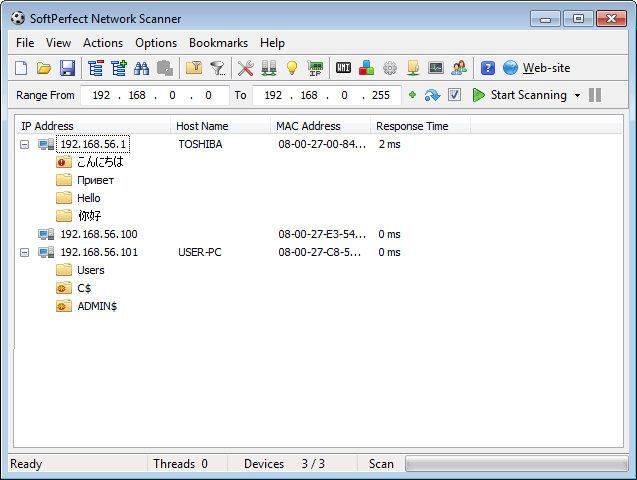
- If you have a windows PC or laptop you can use a free tool like softperfect's network scanner (http://www.softperfect.com/products/networkscanner/). This tool will scan your local network and return a list of each IP address on the network together with its corresponding MAC address.
- If you have a linux box then you can use arp and ping to find the S200's IP
Router DHCP Lease table example from Linksys
Here is an example of a DHCP lease table from a Linksys/Cisco router/gateway. It shows that our S200 is at IP 192.168.1.102 (the MAC is highlighted).
SoftPerfect Network scanner
The scanner is free to download. You run it by telling it where your local network addresses start and end. It will then map your local network returning MAC addresses and IP addresses for each on-line device. In the example below the tool has scanned a class C network 192.168.0.0/24 and returned what it has discovered.
ARP/PING (Linux)
- reboot your S200 appliance and give it a minute to come up
- at your linux box run arp to show the devices in the arp table
arp
Address                  HWtype  HWaddress           Flags Mask            Iface
pc-00102.aelintra.local  ether   F0:AD:4E:01:4B:C9   C                     eth0
pc-00038.aelintra.local  ether   00:0C:29:D1:EC:1F   C                     eth0
pc-00115.aelintra.local  ether   00:0C:29:9D:32:79   C                     eth0
pc-00039.aelintra.local  ether   00:0C:29:12:57:79   C                     eth0
pc-00238.aelintra.local  ether   00:0C:29:B0:82:68   C                     eth0
pc-00116.aelintra.local  ether   00:0C:29:A5:6E:05   C                     eth0
pc-00228.aelintra.local  ether   00:0C:29:3D:AC:67   C                     eth0
pc-00107.aelintra.local  ether   00:0E:A6:1B:BB:17   C                     eth0
pc-00001.aelintra.local  ether   00:0F:66:D9:74:CD   C                     eth0
As you can see, our appliance (F0:AD:4E:01:4B:C9) is first in the list. We can ping its name to get the IP
ping pc-00102.aelintra.local
PING pc-00102.aelintra.local (192.168.1.102)
Logging in to the browser application
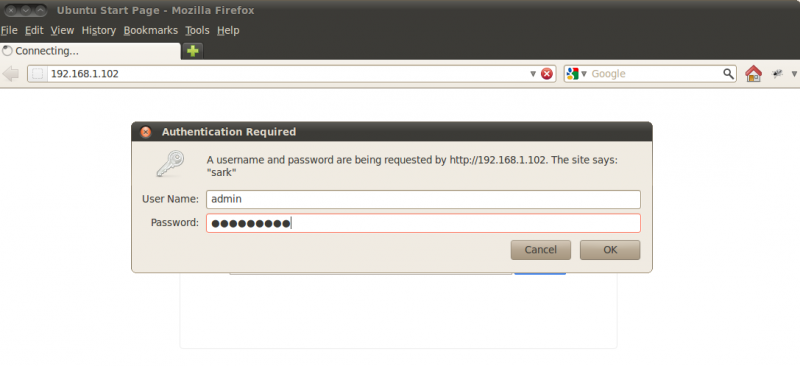
Once you have determined the IP address of your S200 you can go ahead and log into it using a browser. Simply browse to the IP address. The S200 has been tested with Chrome, Firefox, MSIE and Safari. It may not work with other browsers.
Default User and Password
Out-of-the-box, the default user-id is admin and the password is sarkadmin. You can change the password to a secure one in the browser itself once you are logged in. Enter your user-id and password and press return.
Page Layout
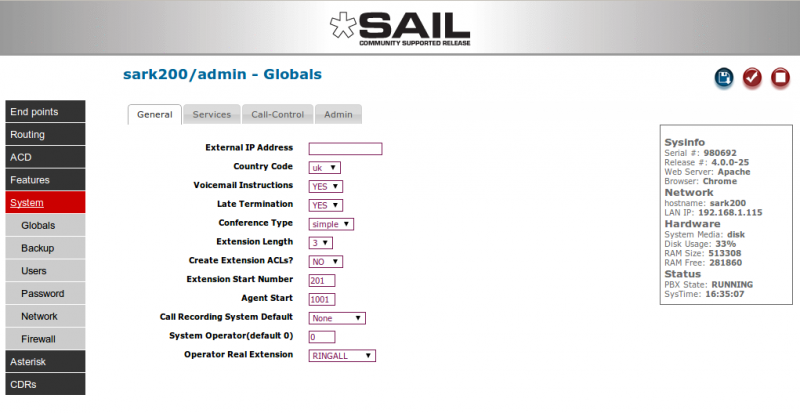
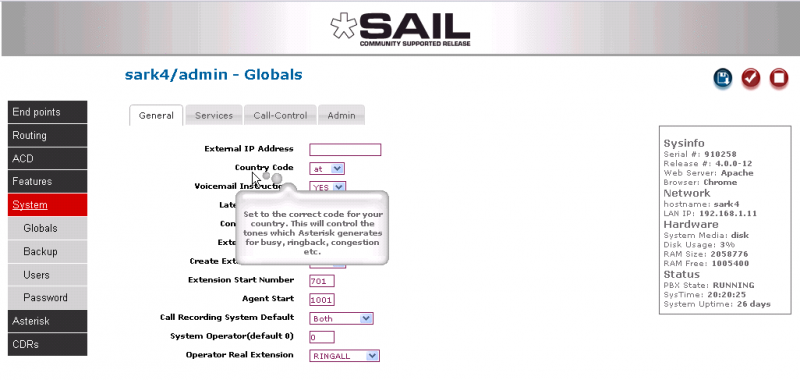
The SARK browser pages follow a standard layout. The figure below shows a typical SARK Web page.
Navigation is handled by the "accordian" exploding column to the left of the screen. Modifiable data appears in the data window in the centre and information and action buttons appear to the right. All data fields have instant help (simply hover your mouse over the field or column title). To save your changes, press the save button (disk icon). To commit your changes (i.e. bring them into service), click the tick, or checkmark, button; this will cause SARK to regenerate the underlying Asterisk configuration files and issue a soft reload to the PBX.
Getting Help
Every name field in the system has context sensitive help associated with it. All you need do is hover the cursor over any name field for an explanation of the field's function.
Next Steps
The rest of the S200 software is the same as any other SARK V4.0.0. You can learn more in the SARK/SAIL Wiki pages where you will find useful information on defining and running your system.
