Getting Started
Getting Started
This chapter assumes that you have installed SAIL from the iso download and you now wish to begin using it. The PBX control application is browser based. In sail-3.1 you can browse to it with
* https://ip-of-your-pbx/sail
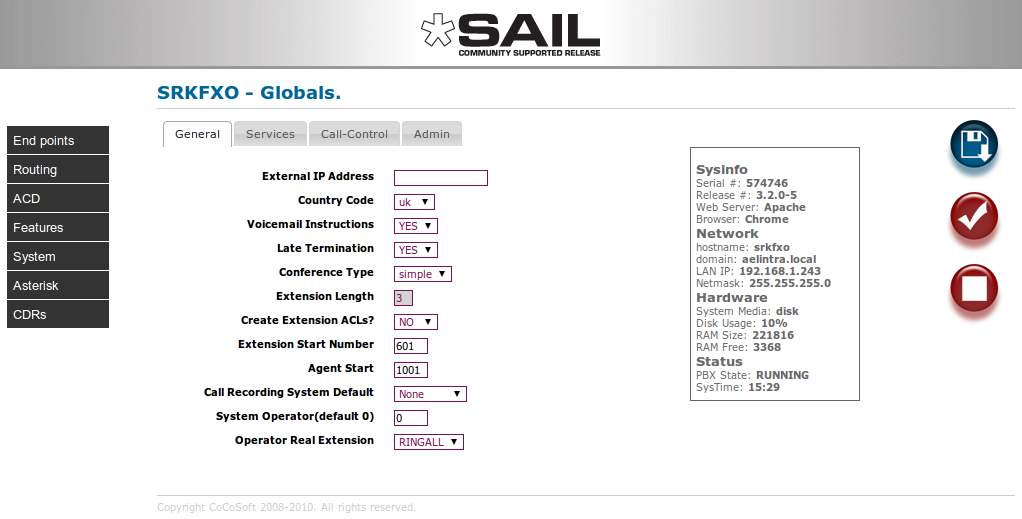
This will challenge for a user id and password. The user-id is admin and the password is whatever you entered when you installed the iso. Assuming all goes well you will be presented with the SAIL globals panel.

The System Statistics section (to the right) shows general status information. Navigation is handled by the column to the left of the screen. Modifiable data appears in the data window in the centre and information and action buttons appear to the right. All data fields have instant help; simply hover your cursor over any heading for an explanation bubble. To save changes, press the save (disk icon) button. To commit your changes (i.e. bring them into service), click the tick, or checkmark, button; this will cause SARK to regenerate the underlying Asterisk configuration files and issue a soft reload to the PBX.
The default set-up
SARK is initially set-up to allow you to install it and be up and running within just a few minutes of powering it up. Provided you deploy SIP PnP capable phones (such as Snom, Yealink or Gigaset), they can be automatically configured and registered on-the-fly when they are powered-up (see the section on PnP below).
Hardware SARK servers are ready to receive calls as soon as they are powered up, however for a software install onto your own hardware, there is a little more work to do. You will need to define your trunk lines (eithet SIP, IAX or ISDN). As phones are added to the system, they are automatically added to a special ring-group called the ‘RINGALL’ group. This provides a convenient way to automatically send inbound calls to the RINGALL group, which will ring all of the phones, and ‘first to pick-up’ will get the call. The RINGALL group can be removed as and when you move to more sophisticated routing and ACD configurations but initially it just allows you to get up and running very quickly. Also by default, outbound calls will initially be routed via the ISDN hunt group. Of course, you will probably want to progress to more sophisticated call distribution and routing and you may wish to deploy VoIP trunks and perhaps remote phones. All of these things can be accomplished using the SARK browser-based interface. The following sections we will cover some of these topics in more detail.
Adding Trunklines
If you have ISDN (BRI or PRI) or analogue telephony cards installed on your system then you will need to activate them through the You will probably wish/need to create additional inbound and outbound routing (see Routes below) to handle DDI's, ACD and IVR requirements.